
The Death of the Paintbrush
by Corey Shelsta
South Dakota State University Theatre
Large format printers get a lot of use in the theatre department. We print our groundplans, technical drawings, and light plots. We can print large radius sweeps in full scale to make them easier to cut in the scenery shop or print full scale cutting patterns for intricate windows. The costume shop prints full size custom patterns for costume pieces. One use often overlooked is using it to print stage size scenic elements. In this article I will discuss some ideas and methods for using your large format printer to put your paint shop out of work.
It started a number of years ago in a production meeting. The prop master was bemoaning a series of specific paintings required for a production. As I sat at the table I recalled having to track down a picture of cucumbers for a production of No Sex Please, We’re British, and who has not had to deal with reproducing that Kandinsky painting for Six Degrees of Separation? “We need them all to be about two by three,” I heard him say as my mind returned to the meeting. I glanced down at the light plot in front of me on the table, neatly printed on Architectural D size paper – 24” x 36”.
I cannot even count the number of paintings, posters, newspapers, logos, and other things I have printed for props since that time. Most often we simply scale up a jpeg found on the internet such as in the photo below of the Byzantine images from Pippin.

Pippin
With the abundance of readily available images, almost anything can be found. Other times we use an image of an actor that has been processed in a photo editing program to appear more painterly. The completed image is then printed out and used on the set, such as the portrait of Grandpa Brewster in Arsenic and Old Lace below.
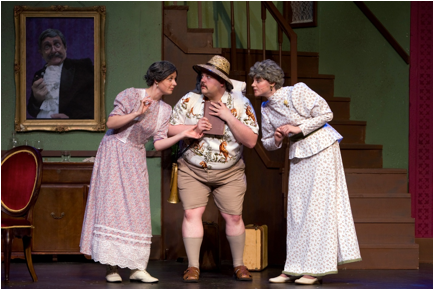
Arsenic and Old Lace
The natural evolution of printing things for props led me to experiment with printing full scenic flat-sized pictures. If I can print something that is two by three, surely I can print something that is two by fourteen. The setup is actually very simple- a photo editing program installed on a computer and a large format printer. I use Corel PhotoPaint and Adobe PhotoShop for editing the images. For those on a budget both Macs and PCs have photo editors pre installed, and there are a number of free photo editors out there such as Picasa and GIMP. My printer is an HP DesignJet 500. It prints images up to two feet wide. Had I known that I would be using it for printing scenery when I purchased it, I would have looked at a three foot wide (or larger) model.
The first full set I printed was for a production of Leaving Iowa. The set began with a map of Iowa I found on the internet. 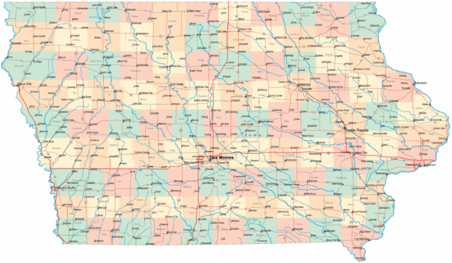
Leaving Iowa Map
I took sections of the map and layered them on a scaled image of the flats. Each section was stretched, distorted and color manipulated. The rough images are shown below.
|
|
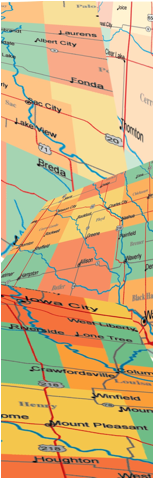
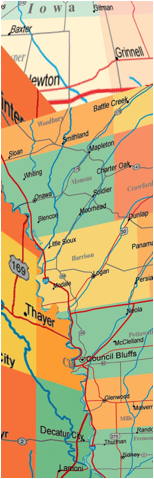
Leaving Iowa small scale jpegs
It is much easier and faster to work with a small image and then blow it up to its full size right before it is printed. The printable width on a two foot printer is actually slightly less than two feet. In order to cover a four foot wide flat, the images were divided into horizontal sections and printed on paper sheets that were two feet high by five feet. The extra paper at the ends gives us part of the paper to hang on to while it is being put in place.
The flats were hard surfaced and painted white. Unpainted ply can show through the surface of the paper and distort the colors of the image. As this was our first attempt, the shop crew simply used the white paint we had on hand which was a flat white. Gloss works much better as it gives a smoother surface for the adhesive to bind to. Once the paint was dry, we used a spray adhesive to attach the paper, making sure to keep it stretched as we placed it. Each section was then added, carefully lining up the seams.
Another lesson learned from this first time experiment was the effect of humidity in the South Dakota summer on paper. As can be seen in the photo below, wrinkles and folds appeared in the set as time went on. 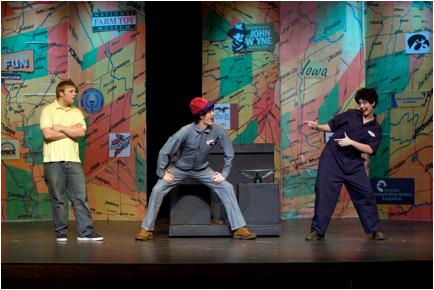
Leaving Iowa
These were easily fixed, but heavier paper and better adhesion techniques as we have done this more have helped lessen the effects of humidity on subsequent projects. Incidentally, the wrinkles in the paintings from Pippin were actually put in on purpose to add an aged look.
The New York skyline window in White Christmas was done in a similar fashion. Because this was intended to look like a window, we had the advantage of the window frames to hide the seams. This picture was blown up and divided into 8 equal sections measuring approximately two by fourteen. It was spray mounted on gloss white hard covered flats and the window detail added on top. The effect was quite stunning on stage when the curtain went up on the scene.
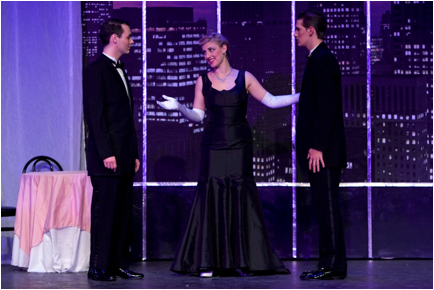
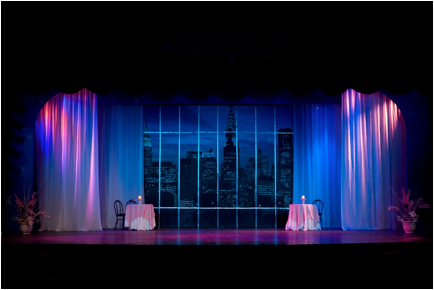
White Christmas
Some tips for printing scenery:
- Use an appropriate material for the job. Most large format printers can take rolls of plain paper, vellum, photo paper, or even canvas.
- Work small then scale up. Manipulate your objects and pictures on a small scale before enlarging them to print.
- Make sure all of your ink cartridges are full BEFORE you run out of ink halfway through a 12 foot long panel. Trust me on this one.
- MAKE SURE you switch your file to CMYK colors (the colors of printer ink) before you print it. Your screen displays in RGB. If you do not switch to CMYK your colors will come out differently than what you see on the screen.
- Just like in scenic painting, the images are not going to be viewed up close. There is no point in printing something at 300 dpi resolution. 72 dpi works just fine when your closest audience member is 30 feet away.
- Take the time to make sure the images are finished, cropped, and aligned properly before you send it to the printer. The print preview function is your best friend in projects like this.
- Gloss white works better as a base than flat white.
- Use a good quality spray adhesive and work SLOWLY when putting the panels in place. This is no time to cut corners if you want a quality looking product.
- This is not a good technique unless you have your own large format printer. Having this done at a commercial printer can cost up to five dollars PER SQUARE FOOT or more. A single two by fourteen panel from the White Christmas window was 28 square feet. Multiply that times eight panels and it adds up quickly.
Printing scenic elements has saved us a lot of time in our shop. Complicated designs that would take days to paint can be done in an afternoon. While not a substitute for good scenic painting, it offers an additional technique to be used in our productions for often very dramatic effects.