Using Molecular Origami
The best way to learn how to use Molecular Origami is to experiment with
it. A few things are not quite self explanatory, so this should help.
You can learn more about these sections of the program:
Bond Info - Select maximum bond distances
Coordinate Data - A list of the selected
atoms
Internal Coordinate Info - Choose to view
common geometries
Origami Design Studio - Design the paper
structures
Protein Data - Choose off a list the groups
you want displayed.
Selection List - Displays position or
distance & angle info of atoms surrounding the center atom
Space Group - In a unit cell, choose from
230 possible groups
View box - Where you see the picture of the
selected atoms
Bond Info
top

- To enlarge click on the small bond info box
- Max Distance: _____
- Lets you change the maximum distance of bonds in the molecule
- Check the center atom box to see the arrangement around that atom
Coordinate Data
top
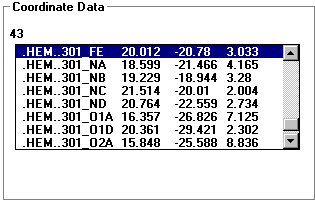
- This is the data for all the atoms displayed in the view box.
- The number displayed in the upper left corresponds to the number of
atoms selected in the view box.
- Each entry consists of:
- Atom name
- Heteroatoms begin with a . for sorting reasons
- Group name and number come next
- After the _ is the atom name. If there is more than one of
each atom in a group the similar atoms are lettered or numbered. For
example: an amino acid group will have at least a C, CA (alpha carbon),
and CB (beta carbon).
- X, Y, Z Coordinates
- Double click on an entry to change it to the center atom.
Internal Coordinate Information
top
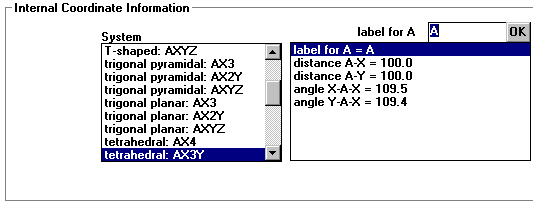
- System
- You can choose from selected list of common molecular
geometries.
- Changing the properties
- To change the label on an atom - click on one in the view box
and then enter a new name.
- To change bond lengths or angles - click on the list and enter a
different number.
- Press Ctrl + up/down arrows to gradually change the numbers
- Notice that if you change one angle it can effect the others.
Origami Design Studio
top
- Where you can manipulate the paper structures and prepare them for
printing.
- See a sample page
- Using the settings box in the upper left.
- Rotation
- In the circle, move the line to rotate the picture
- You can also enter the rotation numerically
- Scale
- Move the red and blue bar up and down
- Enter a new scale size
- Translation
- Use the mouse to move the dot in the rectangle
- Change the X or Y offsets by entering new numbers
- Center - recenters the structure in the middle of the page.
- The origami picture
- Moving it
- Translate - Drag with left mouse button
- Rotate - Drag with right mouse button
- Rearranging the structure
- Left click on an edge
- A red dot will appear on the identical edge somewhere else.
- Double click to move
- Double click an inner edge to change the opening
- Finding Bond distances and angles
- Bond distances - click on an edge
- Angles - click inside an angle, more towards the middle than by the
tip.
- All angles and bond lengths are printed with the structure.
Important - in order to save the origami, you need to save it
in a view back on the main page. Either resave the view or save a new
one. Make sure to save the .mo file as well.
Protein Data
top
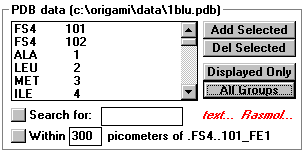
- Add / Delete Selected
- Click to add or remove the highlighted groups from the view box
- Displayed Only
- Click to list atoms/groups in the view box
- All groups
- Click to list of all the groups in the file
- text...
- Click for the text part of the file. This includes everything but
the coordinates.
- Rasmol...
- RasMol is a common protein modeler, used mainly to view the
entire protein.
- Click to open RasMol with the current protein.
- If you have RasMol, but is not working you need to make the mo.ini
file point to your version.
Look under About to learn how.
- Search for: _____
- Search for Amino acids with their three letter abbreviation.
(exa. gly)
- Search for atoms with their periodic table abbreviation.
- Single letter atoms (N, O, P, S) turn up any group with those
letters in them. This results in the search returning a long list.
- Within_____ pm of _____
- Returns all the groups within a entered distance of the selected
atom.
- Click on the button to start the search
Selection List
top
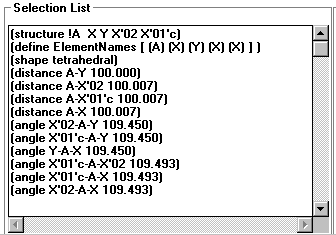
- This lists all the distances and angles around a selected center atom.
- Also states the shape if it can be determined.
Space Group
top
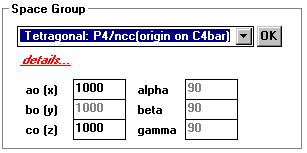
- Is used with Crystallographic Info
- Space Groups are the different conformations within a unit cell
- Click on the space group desired
- 230 choices
- details...
- Click to view and hide details
- ao(x)... & alpha...
- Used to change the shape / dimensions of the unit cell.
- Click OK for the changes to take effect
View box
top
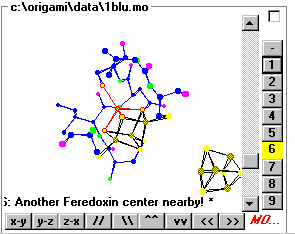
- Rotating the molecule.
- Drag the mouse while holding a button
- Left button - Rotates the molecule in three dimensions following
the mouse.
- Right button - Rotates the molecule in the plane of the screen.
- Click one of the buttons on the horizontal bar on the bottom
- The x-y, y-z, z-x buttons give you head on views of the unit cell.
- Holding down the other buttons enables continuous rotation.
- Doubling the display size
- Click the small box in the upper right.
- Zooming in and out
- Move the box on the vertical scroll bar.
- Clicking on an atom.
- Left click on an atom and its name will appear in the upper left.
- Right click on an atom and a menu pops up that can:
- List the current design and shape
- Append all groups within a given distance
- If an amino acid - append toward either the N or C terminal end.
- Remove the selected atom, group, or chain segment
- Finding bond distances and angles.
- Left click on atoms - what you have selected will appear in the
upper left.
- Right click on either the last molecule selected or in blank space
- Information will be displayed in the pop up menu.
- Saving Views
- Right click on the view number you want to set.
- Enter a caption for the view.
- Remember to save the .mo file or the view will not be saved.
Back to the top
Back to the Molecular Origami Home Page


